
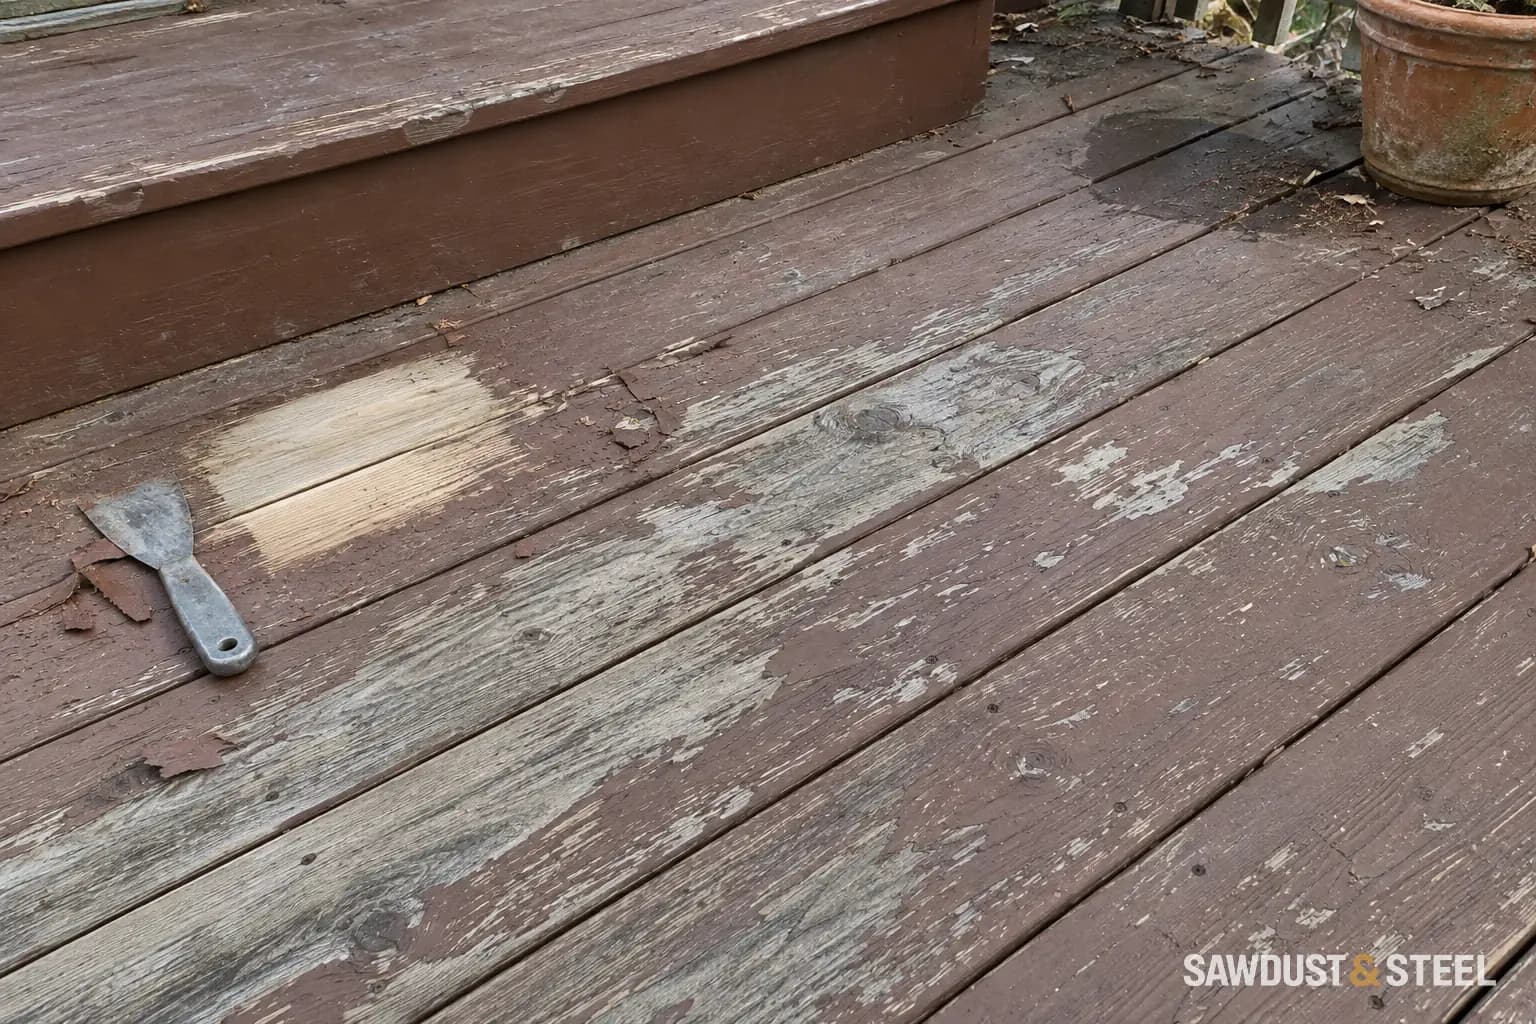
Peeling stain is a preparation job before it is a colour choice. Map the loose coating and wet areas, identify the old finish if you can, then test the removal and replacement system on one representative section. Another coat cannot make loose coating hold on.
A named stripping and preparation sequence
For peeling stained wood, Benjamin Moore's Woodluxe deck preparation guide describes removing loose finish, using Wood Stain Remover where needed, rinsing and following with Wood Brightener & Neutralizer. It calls for at least 48 hours of drying before sanding in that sequence. This is a named manufacturer example; use the labels for the products you actually buy, including their safety and runoff requirements.
Remove
Use the selected system to remove the failed coating; do not leave lifting edges under the test.
Rinse and dry
Complete neutralizing and rinsing as directed. Check shaded and exposed boards separately.
Prepare
Remove raised fibres and dust using the finish maker's sanding guidance.
Apply and assess
Use the specified spread rate and drying interval, then inspect colour, uniform absorption and adhesion.
Forty-eight hours is not a promise that every board is ready. Rain, shade, damp ground below the deck and trapped debris can keep wood wetter for longer. Use the stain's stated moisture limit and the meter method recommended for that wood if a numerical limit is specified. A water-drop test can reveal absorption differences, but it does not measure moisture content or prove adhesion.
What a successful patch should show
| Observation | Decision |
|---|---|
| No loose edges; finish absorbs or forms the intended film evenly | Proceed only if the appearance and product conditions are acceptable |
| Patch stays tacky or glossy where the product should not | Recheck spread rate, old finish compatibility and drying conditions |
| Lifting edges or flakes return | Preparation has not reached a sound surface |
| Wood is soft or badly split | Repair the board before refining the finish |
Choose a patch that includes a troublesome weathered board, not only the nicest sheltered corner. Photograph it dry and save the product names, batch and application date. If you want to change from an opaque coating to a transparent finish, agree what residual colour is acceptable before stripping the entire deck. Some old pigment will not disappear politely.
If the stain is concentrated around metal, check outdoor fastener staining. If the underside stays wet, investigate water pooling beneath the deck before committing to another finish.
Read the pattern before choosing the repair
Benjamin Moore's preparation guide distinguishes weathered wood, discoloration, and failing coatings. Photograph where peeling occurs and identify the previous product. Areas that stay damp or receive runoff deserve attention before a colour decision.
| What you see | What the preparation plan needs to address |
|---|---|
| Flakes or edges lifting from the wood | Remove the failing coating with a method compatible with the wood and chosen finish. Do not bury loose edges under another coat. |
| Bare, grey wood beside coated patches | Prepare the exposed weathered wood as well as the remaining coating. Test the colour across both surfaces. |
| Old finish that still appears firmly attached | Identify the product and check the new coating's compatibility instructions before deciding what can stay. |
| A patch that stays damp beneath a planter or runoff | Correct the wetting or drainage problem and meet the coating's drying requirements before recoating. |
Price preparation honestly
Ask what will be removed, what can remain, and how the surface will be made ready for the chosen product. Drying and application conditions belong in that plan. Do not assume a fixed wait works after every wash, or that more coats automatically mean more protection. Use the product's current technical sheet.
Before the next step
- Save the old product name if available.
- Check runoff and damp areas before coating.
- Approve a dry test patch and a weather-dependent schedule.
A good quote explains the unglamorous hours before the stain goes on. Those hours are often the difference between finishing the job and scheduling it again.