
Every couple of weeks a homeowner walks us through their main floor, points at a wall, and asks if we can just take it out over a long weekend. The answer is almost always yes — we can take it out — but the long-weekend part is where the conversation gets interesting.
If it's a load-bearing wall, the job is a structural scope with an engineer, a permit, temporary walls, and an inspection. Here's what that actually looks like, start to finish, written by the people who have done it about sixty times across the GTA. If you're already weighing the materials question, our LVL vs steel vs glulam beam comparison pairs cleanly with this post.
How do I know if a wall is load-bearing?
A wall is load-bearing if it carries weight from above — joists, another wall, a roof, or some combination. The fastest tells: it runs perpendicular to the floor joists above it, it sits directly over a beam or foundation wall in the basement, or it stacks with a wall on the floor above. Any one of those three is enough to take the wall seriously; two of three and you're almost certainly bearing.
The only way to actually confirm it is to open the ceiling or the floor above and look at which way the joists run. We usually cut a 12-inch inspection hole in the drywall ceiling on one side of the wall, stick a phone camera in, and take photos of the joists where they meet the top plate. If the joists are landing on the top plate — even partially — the wall is carrying them. The whole inspection takes about fifteen minutes, and we patch it later the same day we frame the opening.
The myth that exterior walls are load-bearing and interior walls are not is exactly that — a myth. About half the interior walls in a typical GTA bungalow or two-storey are bearing something. If a previous owner removed one without an engineer, we occasionally find a 2x4 stud wall carrying what should have been an LVL beam. That's the sagging floor you keep noticing.
- Joists above run perpendicular to the wall — likely bearing.
- The wall stacks over a basement beam, teleposts, or the foundation — likely bearing.
- There's a wall directly above on the second floor — likely bearing.
- The wall runs parallel to the joists and carries nothing above it — probably non-bearing, but still verify.
- A knee wall in a balloon-framed house — often bearing part of the roof, even when it looks decorative.

What does the structural engineer actually do?
The engineer calculates the load the new beam has to carry, specs the beam size and material, specs the posts at each end, specs the bearing points those posts land on, and stamps a drawing that the city accepts for permit. On a straightforward single-storey removal she can do this from photos and existing dimensions in about two days. On a two-storey house with a roof load on top she usually comes out in person. Heavier scopes tend to end up in the second storey addition cost breakdown territory — a different conversation.
We've worked with the same PEng for five years. She knows how we build, we know what she'll sign off on, and neither of us wastes time arguing about whether a `1.75"x9.25"` LVL is enough when we all know the answer is probably a 1.75"x11.875" three-ply.
Engineer fees in the GTA run $650 to $1,400 CAD for a residential load-bearing wall removal — less if it's photos and email, more if she has to do a site visit and a framing inspection at the end.
Every so often a homeowner asks if they really need the engineer. Technically you need a permit, and the permit needs a stamped structural drawing, and the drawing needs a PEng to stamp it. So yes. Also the engineer is the person who tells you whether you need a 20-foot LVL or a W8x18 steel beam, and that decision is usually the difference between $3,000 and $8,000 in beam costs alone. Our framing and structural service page covers the rest of the scope on these jobs.
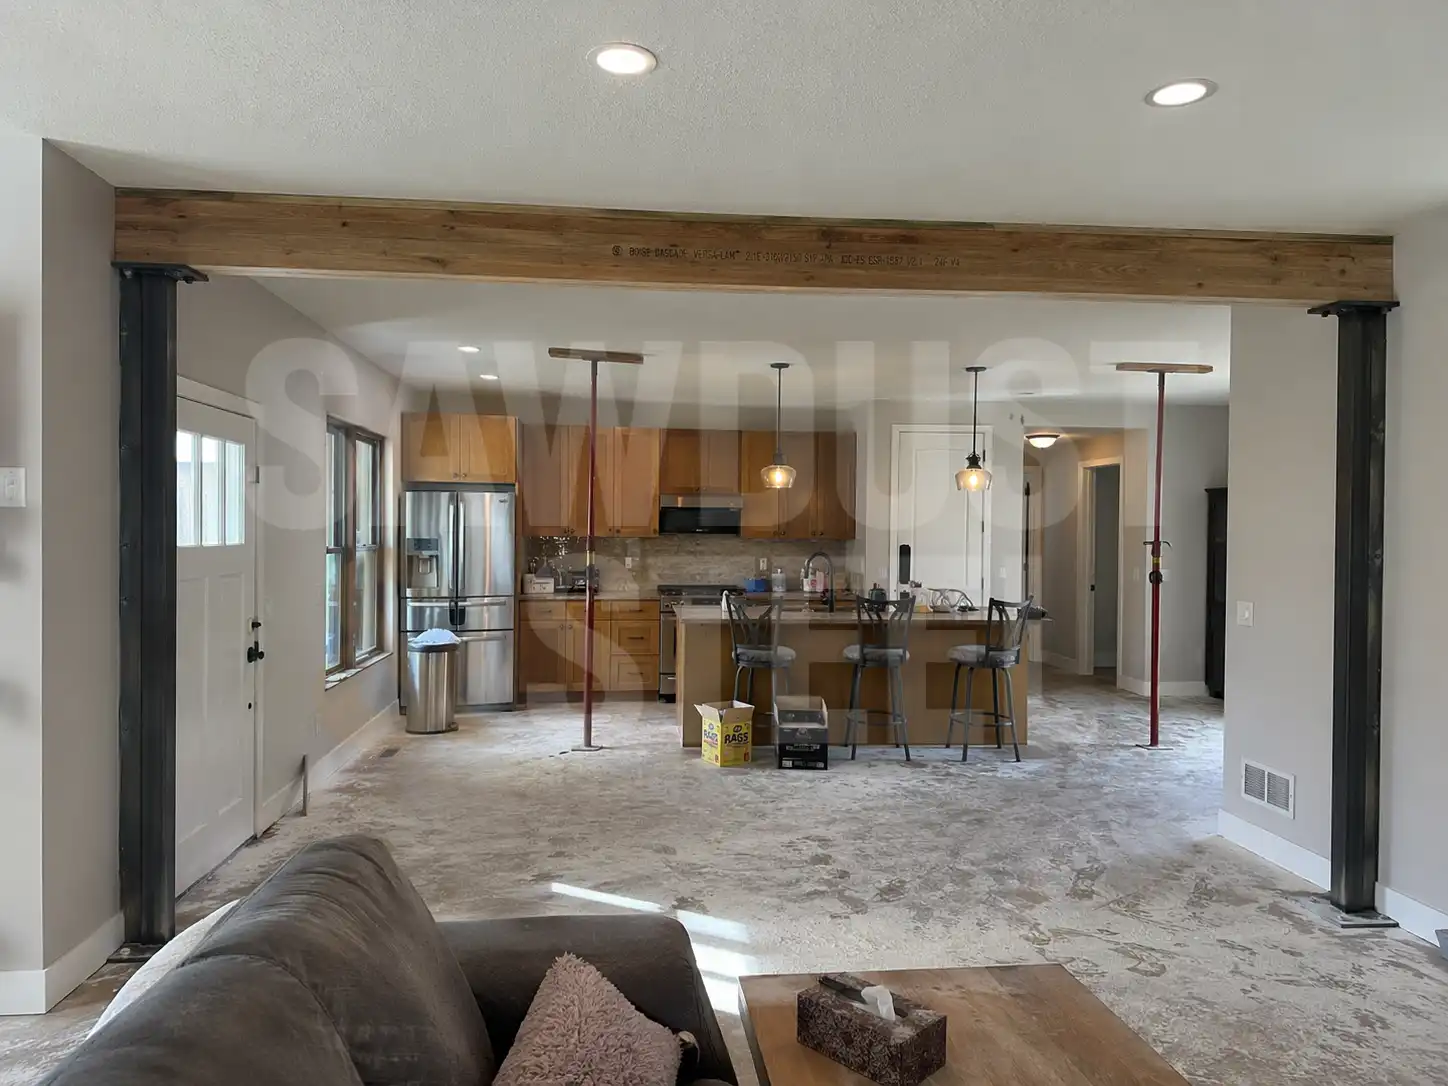
LVL beam or steel I-beam — which one?
The engineer makes the call, but the choice usually comes down to span and headroom. LVL (laminated veneer lumber) is lighter, cheaper, and easier to install — we can carry a 20-foot 3-ply LVL into the house through a window with four people. Steel is heavier, more expensive, but it's shallower for the same load, which matters when ceiling height is tight.
- Spans under 14 feet, single-storey load above: almost always a 3-ply 1.75"x9.25" LVL, about $900–$1,300 CAD in materials.
- Spans 14 to 18 feet, single-storey load: 3-ply 1.75"x11.875" LVL, roughly $1,400–$1,900 CAD in materials.
- Spans over 18 feet, or with a second storey and roof above: 3-ply 1.75"x14" LVL or a W8x18 steel beam, $2,200–$4,500 CAD.
- Spans where ceiling height is already tight and the homeowner doesn't want a beam drop: W10x22 steel flush-framed between the joists, $5,000–$8,500 CAD installed.
Flush-framed steel is the prestige option and the pain option. It means cutting every joist back to the face of the beam, hanging each one on a Simpson Strong-Tie joist hanger bolted to the web of the I-beam, and crane-lifting the steel into the opening. It's beautiful when it's done — no beam drop, ceiling stays flat — but the install runs two to three days longer and the beam itself usually needs a crane or a lull, which is another $800 to $1,500 in equipment rental.
The Lius chose a dropped LVL in painted MDF for exactly this reason; a flush steel beam would have added a week and about $6,000 to the job.

The day-by-day install, temporary walls, and what your inspector actually checks
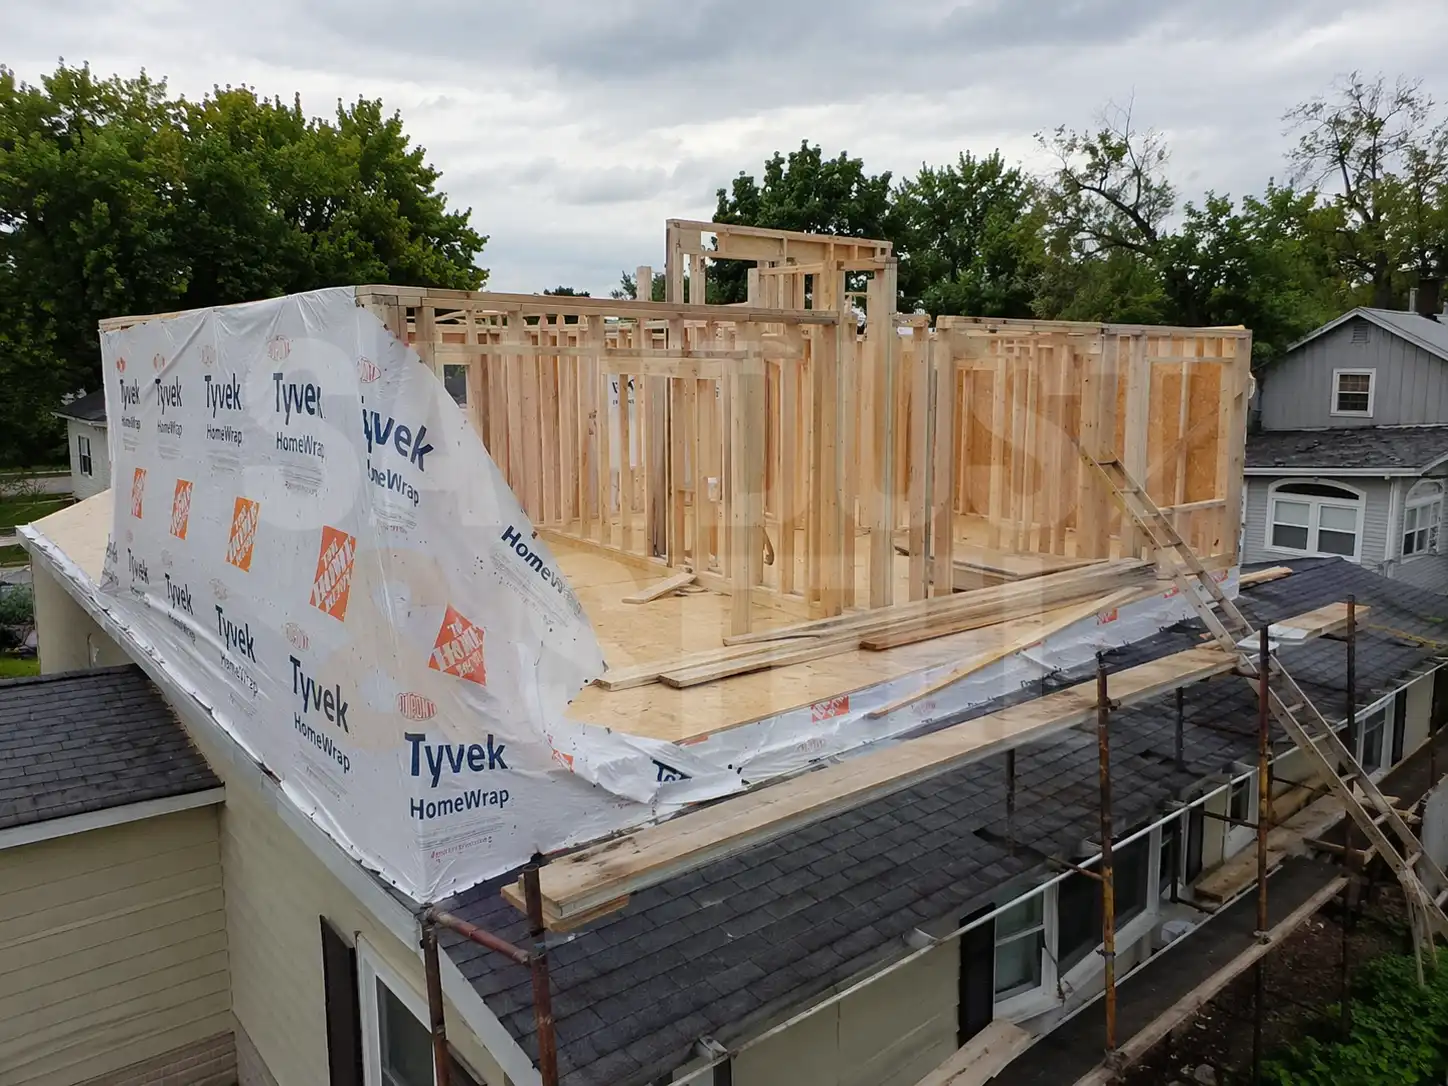
A typical load-bearing wall removal in the GTA runs four to seven days on site, not counting the two to three weeks of permit and engineer work ahead of time. Day one is temporary walls and demo prep. Day two is taking the old wall out. Day three is the beam and posts. Day four is inspection. Days five through seven are closing up ceilings, patching, and finish carpentry around the new beam.
Temporary walls are the single most important part of the job and the part nobody sees. We build two of them, one on each side of the wall we're removing, perpendicular to the joists above. Double 2x4 top and bottom plates, studs 16" on centre, Simpson Strong-Tie screw jacks at every stud so we can snug each one up against the ceiling independently.
We overbuild on purpose — temp walls don't get inspected, so they have to be obviously stronger than the load they're carrying. If a joke makes it into this post at all it's that we've never had a temporary wall fail, mostly because we build them like the client is going to sit under them.
The inspector shows up on day four, usually in the morning if we scheduled early. He checks that the beam matches the stamped drawing (size, plies, grade), that the posts land on real bearing (not just drywall over a floor), that the joist-to-beam connection matches the spec, and that any Simpson hardware called out on the drawing is actually installed. He'll check the beam bearing length at each end — minimum 3.5" for an LVL, 4" for steel under OBC 9.23 — and he'll want to see the engineer's stamp on the drawing in his hand.
Inspection takes 15 to 25 minutes. A first-time pass is normal when the engineer's spec is followed; a fail is usually a missing hanger or a post that drifted off its bearing point during install.
- Day 1: Protect floors, set up dust containment, build both temporary walls, confirm screw jacks are snug.
- Day 2: Cut studs free of the existing top plate with a recip saw, pull the old wall, clean the opening.
- Day 3: Fly the beam in (through a window if it's LVL, through the front door with a lull if it's steel), set the posts on their bearing plates, bolt the Simpson connectors, install joist hangers if flush-framed.
- Day 4: Call in the inspector, walk the job, get the stamp. Temporary walls come down only after sign-off.
- Days 5–7: Drywall the ceiling back, wrap the beam in painted MDF if it's a drop, finish the reveals, clean up.

How much does it cost to remove a load-bearing wall in Toronto?
A straightforward single-storey interior load-bearing wall removal in the GTA — 14- to 16-foot LVL beam, stamped drawings, permit, temporary walls, install, inspection, and drywall patching — runs $8,500 to $14,000 CAD. If you want the full materials breakdown first, our LVL vs steel vs glulam beam comparison walks through when each wins.
Two-storey jobs with roof load above, longer spans, or flush-framed steel run $16,000 to $32,000. The range is wide because the beam choice and the span drive most of the cost.
- Engineer drawings and stamp: $650–$1,400 CAD.
- Permit fee (varies by municipality): $180–$550 CAD in Toronto, Richmond Hill, and Vaughan — Markham and Oakville sit in a similar range.
- Beam materials (LVL or steel): $900–$8,500 CAD depending on span and material.
- Labour for temp walls, demo, install, and patching: $5,500–$12,000 CAD on most jobs.
- Crane or lull rental if steel: $800–$1,500 CAD.
- Finish carpentry around the new beam — wrapping, reveals, crown return — $900–$2,800 CAD.
Permits in Ontario fall under the Ontario Building Code, and a load-bearing wall removal triggers Part 9 structural review in almost every residential scenario. Most GTA municipalities turn around a small residential structural permit in 10 to 20 business days once the stamped drawing is submitted. We pull the permit in the homeowner's name because we have to, but we handle the application, the appointment, and the inspection ourselves.
“We thought it was going to be the worst three weeks of the year. It was honestly closer to a week and the floor above didn't move a millimetre.”
Most of what makes a load-bearing wall removal feel scary from the outside is the unknown. Once the engineer has drawn it, the permit is in hand, the temp walls are up and the beam is on the truck, it's a carpentry job with a deadline. We've done it enough times that the surprises are rare, and the ones that happen — a duct we didn't expect, an old electrical run, a plumber's mistake from 1987 — we've seen before.