
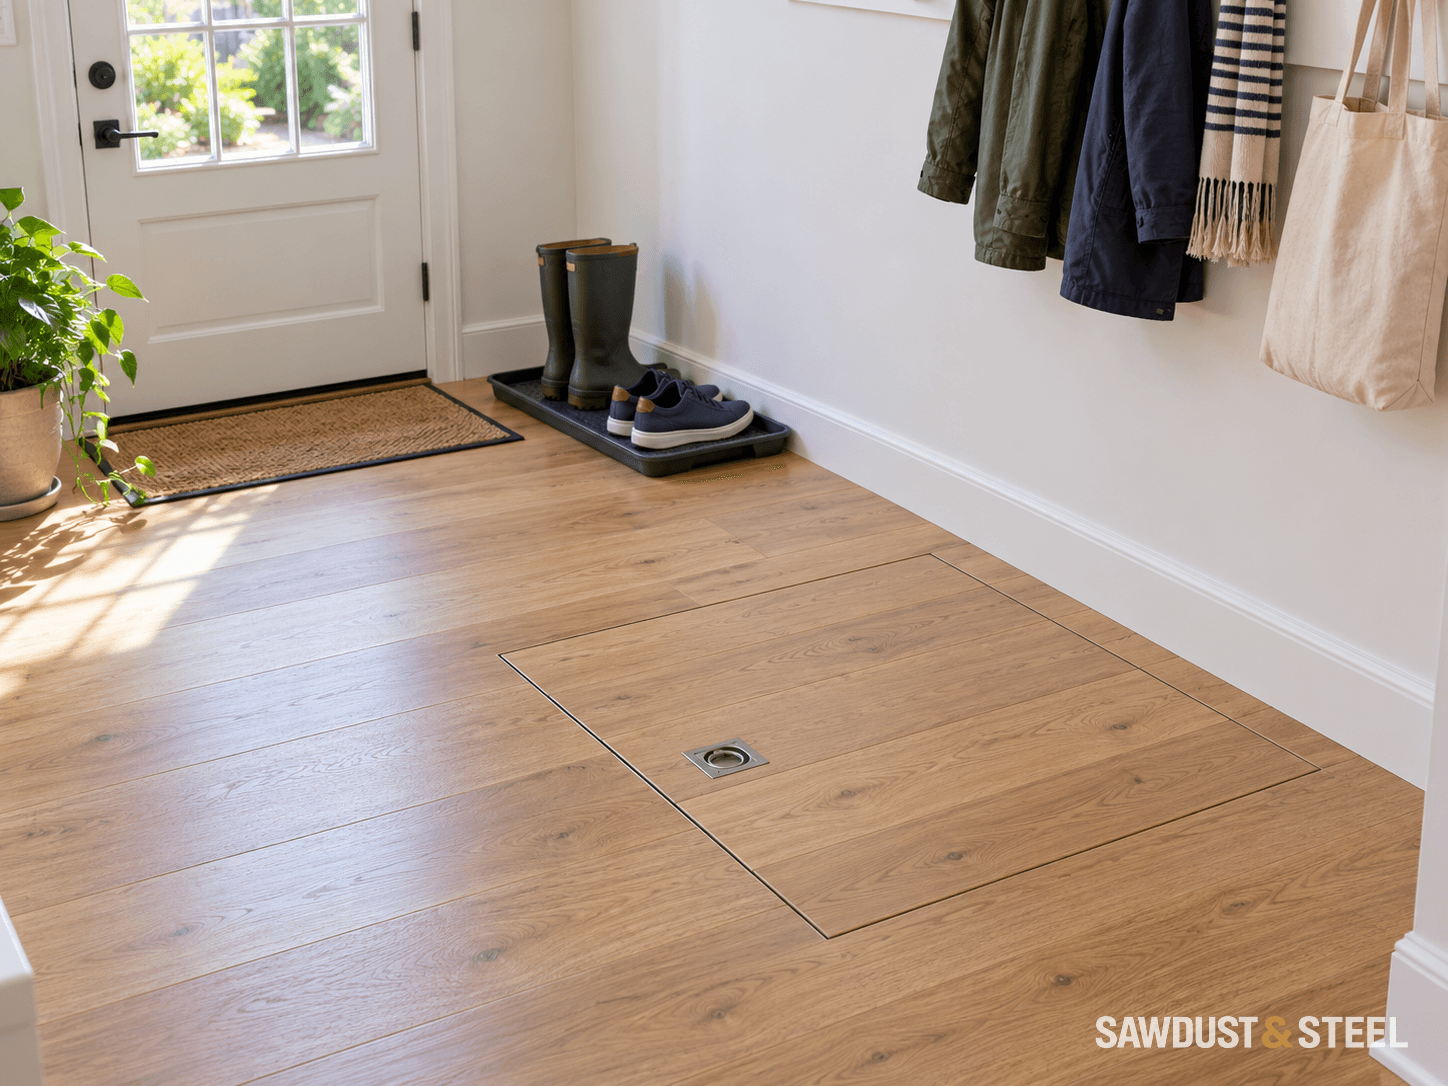
The floor plan has room for a bench, tall storage and a very tidy entrance. It also has a small rectangle labelled access, currently occupied by the bench. Before that rectangle disappears into the cabinetry drawing, find out who uses it, what they carry through it and how its lid will open.
Plan a service route, not just a rectangle
List the equipment and connections reached through the hatch: shutoffs, drains, ducts, pumps or other services. Ask the trades responsible for them what access they need for inspection, repair and eventual replacement. A person fitting through once does not prove that a replacement component or a technician with tools can follow.
Measure the actual clear opening, including anything projecting into it, and record the approach above and below. Keep this assessment to safe accessible views; do not enter standing water, suspect damaged framing or unidentified insulation. Photograph the existing route and give it to the designer before the cabinetry and flooring are ordered.
| Check | Include in the drawing |
|---|---|
| Approach | Space to stand, lift or swing the lid, and handle tools |
| Clear opening | Usable dimensions after the frame, hinges and seals are fitted |
| Route below | Services or framing that obstruct entry and equipment movement |
| Everyday room layout | Cabinet doors, benches, rugs and stored items around the hatch |
| Open position | A secure lid position and protection of the floor opening during work |
The lid has to carry weight and be lifted
A floor hatch is part of a walking surface when closed. Its frame, cover and connections need to suit the intended loading. Cutting a larger opening or moving it may affect joists and other structural members; get that alteration designed before cutting. Do not copy the dimensions of a convenient commercial hatch and assume the surrounding floor is ready for it.
The finish adds weight too. A tiled cover includes tile, bonding materials and the supporting cover, not just the tile sample held in one hand. BILCO's finished-floor access products illustrate how floor-door systems are designed around particular finishes and engineered lift assistance. That is a useful design principle, not a recommendation to fit a commercial model into any house.
Specify how the lid is lifted, where hands go and how it stays safely open. A loose cover also needs somewhere safe to rest without blocking the route. A hinged cover must not be propped on a paint tin while someone works underneath. Keep people away from the open hole during access, and arrange appropriate temporary protection as part of the work.
Detail the finished edge before installation
Show the opening perimeter on the flooring layout. The finish must end in a detail that permits the intended lid movement and removal. A plank, grout joint or sheet finish that accidentally bridges the frame can turn normal access into demolition. Follow the hatch and flooring systems' requirements for edges, movement and support.
Check the final height so the closed lid and its hardware do not create a projecting trip point. Confirm that the pull remains usable after finishing and that dirt can be removed from the perimeter. Hidden does not have to mean unfindable: keep a labelled photograph and opening instructions with the house records.
Continue the chosen enclosure boundary
Establish whether the crawl space sits inside or outside the intended heated enclosure. Natural Resources Canada's Keeping the Heat In guide, section 6.3, explains why crawl-space insulation choices must account for moisture and the services below the floor. Use the walls-or-floor insulation guide to settle that wider plan.
Then ask the designer to show how the relevant air-control and insulation layers continue through the hatch and frame. Where a gasket is part of that detail, it needs repeatable contact after every service visit. A heavy lid sitting loosely on an edge is not automatically airtight, and insulation added underneath must not obstruct the opening or fall away during use.
Open it once the room is finished
At handover, have the installer demonstrate opening, securing and closing the finished hatch with the room's normal furniture in place. Check that the intended service route remains available and that seals reseat. Resolve a binding lid, inaccessible pull or cabinet conflict then. The emergency shutoff should not require remembering which cupboard was secretly designed to move.