
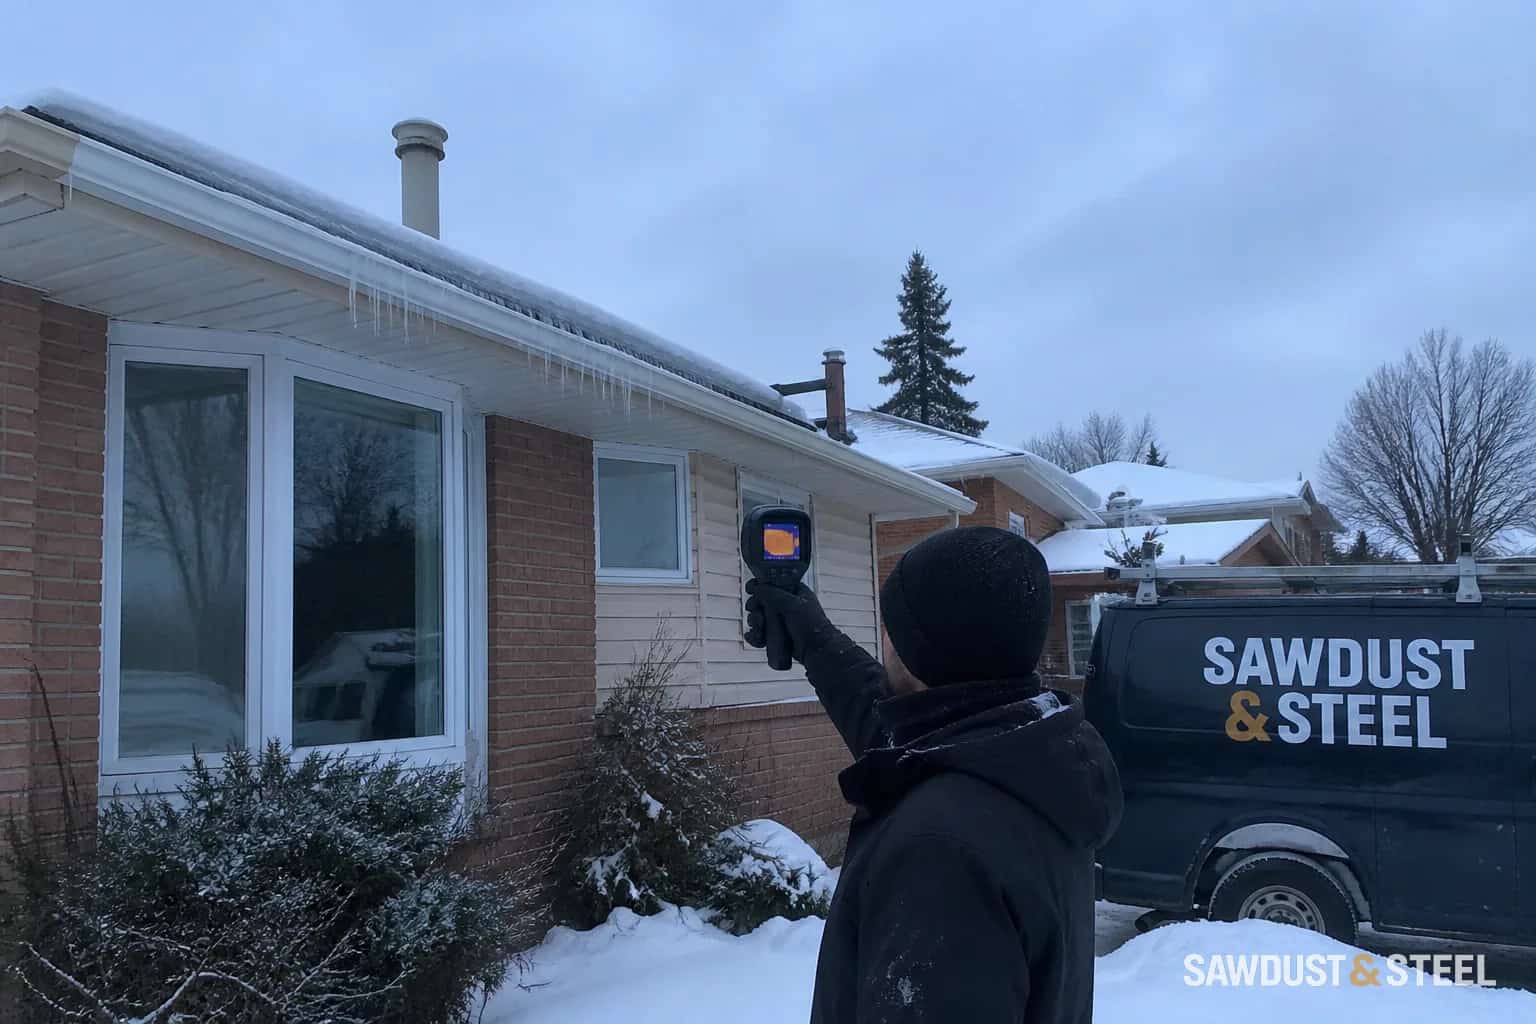
The ice comes back along the same eave every winter. You've cleared the gutter, paid for a patch, and still keep a bucket near that bedroom corner. The missing piece may be above the ceiling: heat escaping into the attic can melt roof snow that freezes again at the cold overhang. Deal with active water first, then follow the heat path before buying the next patch.
How an ice dam forms
Natural Resources Canada's detailed roof and attic guide lays out the sequence. Snow collects. House heat warms part of the roof deck and melts the snow touching it. Water runs to the colder overhang, freezes and traps later meltwater behind it. That water can work under the roof covering and into the attic or wall. A useful assessment follows this chain and identifies where to break it.
Solar heat, valleys, dormers, skylights, dark wall surfaces and wind can contribute, so not every dam has one tidy cause. Still, the repair sequence follows the order NRCan emphasizes: keep house heat out of the attic by air sealing and insulating, then make sure the required roof-space ventilation can do its job.
What the Ontario code does, and does not, promise
Ontario adopts the National Building Code of Canada 2020 with provincial amendments through O. Reg. 163/24. For a permitted renovation, check the current materials on Ontario's Building Code page. The code addresses roof-space ventilation, insulation, air and vapour control, roofing and eave protection as an assembly. It does not promise that every old roof geometry will be ice-dam-free in every winter.
Read the snow before opening the attic
A light, even snowfall or heavy frost can work like free thermal imaging. Look from the ground after conditions have been stable. Areas that lose snow first are warmer than their neighbours. A melt stripe above a top-floor partition or an isolated bare patch gives us a place to investigate. We photograph the whole slope too, including shade and nearby walls: sun and wind can change the pattern without a ceiling leak. On one recurring front-eave problem, the bare strip led us to a poorly sealed dropped ceiling. The gutter had already been replaced once. It was doing a fine job of receiving the same problem.
Safety first when water is already moving
If water is entering near lights, wiring or a service panel, turn off the affected circuit only if it is safe to reach the panel, keep people away and call the appropriate emergency professional. Bulging ceiling drywall can release water and material suddenly. Protect the room, document the damage and avoid standing beneath a saturated area.
Stay off an icy roof and do not chip at shingles with an axe, hammer or ice pick. Canada's current snow and ice guidance recommends clearing drains and downspouts where safe and consulting a professional when persistent dams point to attic insulation or ventilation issues. A roof rake from the ground can sometimes help, but power lines, falling snow, brittle roofing and slippery footing still demand judgment.
Repair priority one: seal the attic floor
Air leakage usually moves more heat and moisture into an attic than vapour diffusion through intact drywall. Warm air rises through gaps and carries water vapour with it. When it meets cold sheathing, it can deposit frost before the roof shows a dam. This is why air sealing comes first. Insulation alone does not close gaps in the air barrier.
- Weatherstrip and insulate the attic hatch, then make sure the latch compresses the gasket.
- Seal wiring and plumbing penetrations at the ceiling air barrier using compatible, code-appropriate materials.
- Inspect the tops of interior and exterior partitions, dropped ceilings, bulkheads and open wall cavities.
- Verify bathroom and kitchen exhaust ducts are sealed, insulated where needed and terminated outdoors, not into the attic or soffit cavity.
- Treat chimneys, flues and heat-producing fixtures with their required clearances and non-combustible details. Do not improvise spray foam against a hot component.
- Deal with recessed fixtures according to their rating and an approved enclosure or replacement strategy.
NRCan's guide stresses inspecting for moisture, correcting the source before insulating and not disturbing vermiculite insulation. If vermiculite or another suspect material is present, stop and arrange appropriate testing or professional advice before moving it. Efficient attic work begins with not turning a building problem into an exposure problem.
Repair priority two: make insulation continuous
After air leaks are controlled, insulation reduces conductive heat flow. Pay special attention to the perimeter above the exterior wall, not just the easy open middle. The roof narrows near the eave, and compressed or missing insulation there creates a warm strip exactly where meltwater begins its trip toward the cold overhang.
Install insulation to the designed level without burying heat-producing equipment, blocking ventilation openings or leaving wind-washed edges. Use baffles or another accepted detail to keep a clear air path where the vented roof design requires one. A raised-heel truss gives this work room; many older GTA roofs do not. In a cramped roof, higher-performing insulation at the edge or an exterior insulation strategy during reroofing may solve what another bag of loose fill in the middle cannot.
Repair priority three: preserve the intended ventilation
Attic ventilation matters, but do not treat it as a giant outdoor fan tasked with overpowering heat leaking from the house. In a conventional vented attic it helps keep the roof space cooler and lets moisture dry outside. NRCan calls ventilation the second line of defence after air sealing and warns that vents do not solve moisture created by air leakage.
Check that soffit, roof and gable vents are not blocked by insulation, paint, debris or poorly placed baffles. Confirm air can move through the intended path rather than short-circuiting between two nearby high vents. Use the net free ventilating area published for the actual vent, not its outside grille dimensions. The current code and roof design govern how much vent area and distribution the assembly needs.
Do not automatically add a powered attic fan. NRCan cautions that a fan can exhaust more air than the soffits supply, depressurize the attic and draw even more warm, moist house air through ceiling leaks. Check the intake and ceiling leaks before considering a powered fan.
What eave membrane and roof work can do
Treat a self-adhered eave membrane as valuable secondary protection, not a cure. The Canadian Construction Materials Centre explains that CSA A123.22 ice-dam underlayments are intended at eaves and valleys to resist leakage from backed-up water. During reroofing, integrate the membrane with underlayment, drip edge, valleys and flashings under the current code, accepted design and manufacturer instructions.
But the membrane does not cool the roof. It can reduce leakage while the dam still grows, loads the gutter and stresses shingles. That makes it insurance inside the assembly, not a substitute for attic work. When a roof quote promises to cure recurring ice dams with new shingles alone, ask where the air-sealing and insulation diagnosis appears.
What short-term measures can do
| Measure | What it can do | What it cannot do |
|---|---|---|
| Professional snow or ice removal | Reduce immediate backup and load | Repair attic heat loss |
| Roof rake from safe ground | Remove some eave snow before a dam grows | Reach every roof safely or fix the cause |
| Heat cable designed for the use | Maintain drainage channels in selected difficult details | Air-seal or insulate the attic |
| New gutters or gutter removal | Improve drainage in the right context | Stop snow melting on a warm roof deck |
| Ice-and-water membrane | Limit leakage beneath roofing | Prevent the ice ridge itself |
| More attic vents | Help a correctly designed vented attic dry | Overpower major ceiling air leaks |
What to ask for in the assessment
- Exterior photos showing the dam and snowmelt pattern from safe locations.
- Attic inspection during cold conditions where practical, including frost, staining and moisture evidence.
- A map of likely air leaks, insulation gaps, exhaust routes and blocked ventilation paths.
- Roof age, eave membrane and flashing evidence, plus any sheathing damage.
- A repair sequence that separates urgent water control, attic work and future reroofing items.
When the stain may not be an ice-dam leak
Water can travel before appearing indoors, so a useful diagnosis correlates the leak with weather and inspects the whole system before prescribing the whole roof. Signs an Ontario roof needs replacement covers broader end-of-life clues. Local flashing plus attic work may suit a younger roof; widespread brittle roofing and damaged sheathing may justify replacement. The diagnosis should earn the scope.
The durable Ontario ice-dam plan
- Manage active water and electrical risk without climbing onto an icy roof.
- Document where snow melts, ice forms and water appears.
- Inspect the attic for air leakage, frost, duct problems and insulation gaps.
- Seal the ceiling air barrier with safe, compatible details.
- Upgrade insulation continuously, especially above exterior wall plates.
- Restore the required ventilation path for the chosen vented-roof design.
- At reroofing, repair sheathing and integrate compliant eave membrane and flashing.
- Check the next cold snowfall. The roof pattern is the commissioning test.
The sequence addresses the heat and water paths that create recurring ice. If the question is structural weight rather than an eave dam, use the Ontario roof-snow guide for the factors that affect roof loading. For roof and attic assessment, start with our roofing and siding service. If damaged rafters, trusses or wall plates are suspected, involve our framing and structural service before covering anything.