
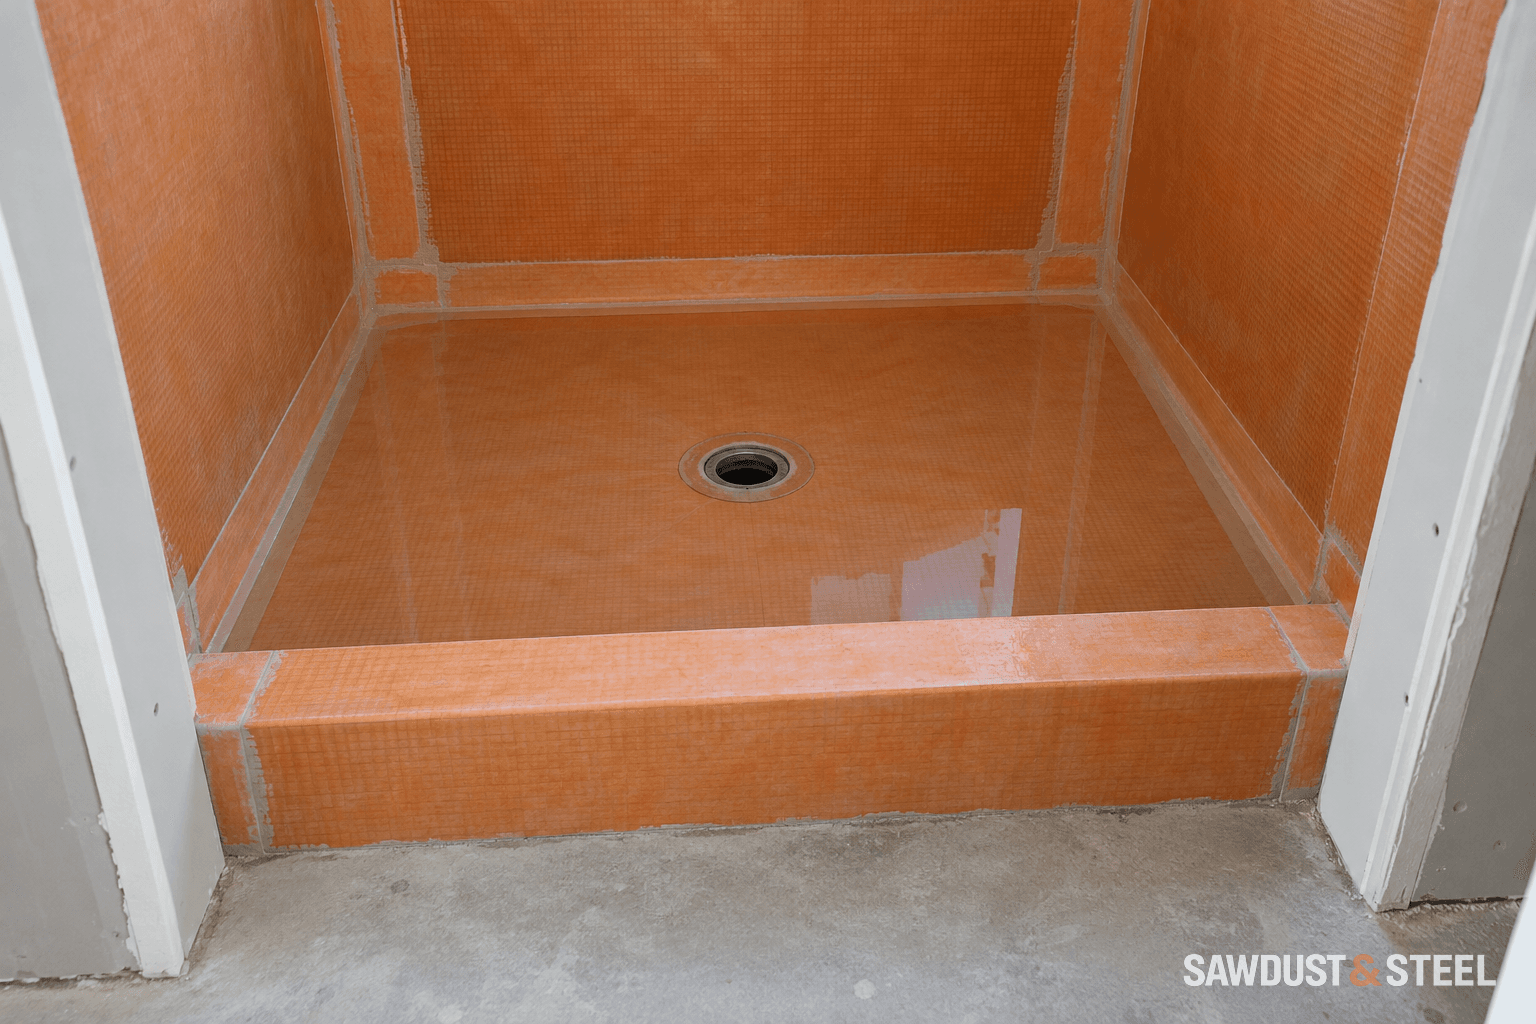
The tile has arrived and everyone wants to see it on the wall. The empty shower is about to have its least glamorous, most useful appointment.
Ask which system and test method apply
Schluter describes water testing as a quality-control check before setting tile. Its instructions include system-specific preparation and timing. Another assembly may require a different process; the installer should identify the applicable instructions rather than borrow a convenient waiting period.
Coordinate any municipal inspection requirements with the test. A photograph of water in a pan is not, by itself, proof that every required review has happened.
Keep the result understandable
Ask the installer how the drain is isolated, how the starting level is marked, and what result the system's procedure requires. Keep the date, test duration, system details, and photos together. If the level changes, the installer needs to establish the cause, including the test setup, rather than simply add water and carry on. Reserve time for correction, curing, and another test in the schedule before tile is booked.
Do not solve a failed test with optimism
- Identify and repair the cause using the system's approved method.
- Allow any required cure time after the repair.
- Repeat the required test or review before covering the work.
- Keep later fixture and glass installation from compromising the assembly.
A successful test is useful evidence at that stage. It does not make later damage impossible or replace correct installation of the rest of the shower.
The next handoff deserves the same attention: where the glass installer can fix through the finished shower should already be agreed before the drill arrives.
A KERDI example: allow curing, then test
Schluter's water-test instructions call for at least 24 hours after installing KERDI under normal room-temperature curing conditions before testing. Cooler conditions require longer. The test itself commonly runs 24 hours. Those are two separate periods: waiting for the assembly to cure is not time spent testing it.
The installer plugs the waste line so the intended drain and waterproof connection are included in the test. A stopper sitting only in the visible grate opening can leave an important joint outside the test. Schluter describes first filling the pipe and drain to approximately the bonding-flange or channel-body level to check the plug, then filling the shower assembly. A curbless entrance needs a properly arranged temporary dam. Do not improvise one by piercing the new membrane.
Make the level record useful
Agree the safe fill level and test boundary with the installer. Mark a fixed reference, record the start time and photograph it square-on. Keep the water supply off during the observation period: topping up erases evidence. Note room temperature, ventilation and any disturbance. A nearby control container can help show that evaporation is occurring, but its different shape and exposure mean it cannot certify that a matching drop proves the shower watertight.
| Observation | Next check |
|---|---|
| Drop while only the drain is filled | Investigate plug placement and the isolated waste section. |
| Drop after the whole receptor is filled | Check the test setup and accessible waterproofing connections; do not assume evaporation. |
| Moisture visible outside or below | Stop and identify the leak before covering the assembly. |
| Stable level during the agreed test | Record the result; protect the assembly from later damage. |
If an inspector needs to witness the test, arrange that before draining it. Record who checked it and which work was visible, rather than treating a phone picture as a completion certificate. Keep the result with renovation handover documents, and leave enough time in the bathroom schedule for a repair and repeat test. Nobody enjoys moving tile day, but the accessible empty pan is the least disruptive place to find a problem.