
The flooring samples arrive in a handsome box. The slab underneath has a crack nobody has discussed yet. It is tempting to let the new floor settle the conversation.
Record what the crack is doing
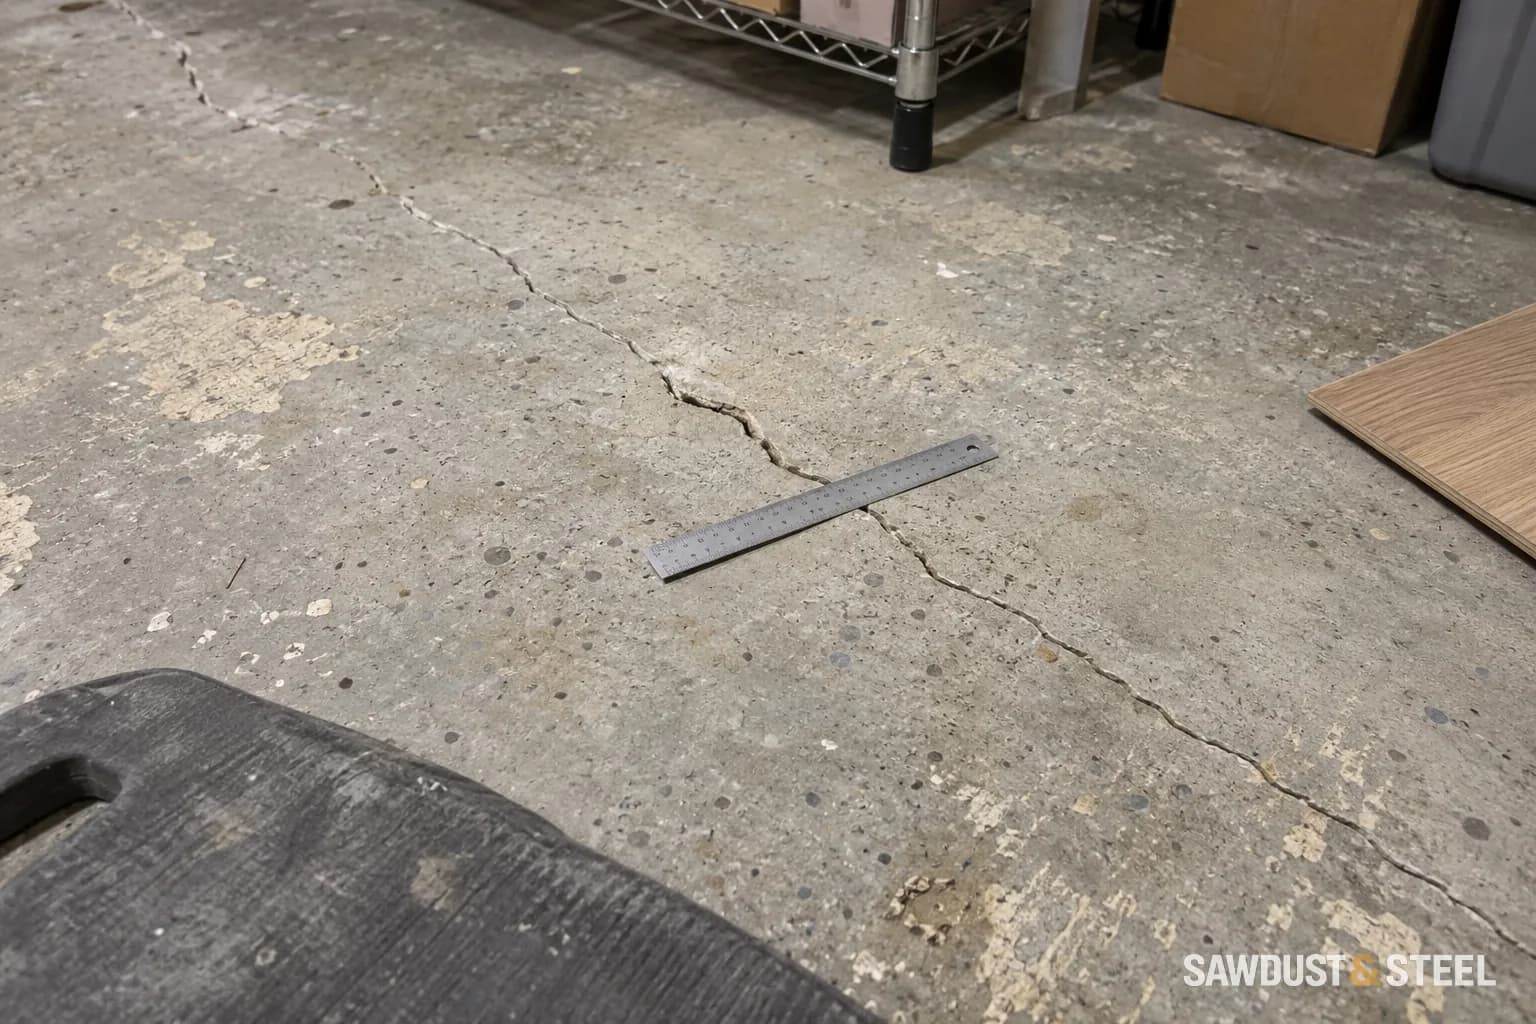
MAPEI's substrate requirements distinguish preparation from slab movement and moisture issues. Photograph the crack, note any height difference or dampness, and have uncertain conditions assessed before selecting the flooring system.
| Record | Why the installer or assessor needs it |
|---|---|
| A wide photo and the crack location on a room sketch | Shows whether the same line continues under a wall, cabinet or proposed transition. |
| Close photos with a ruler beside the crack, dated from the same viewpoint | Makes reported change easier to compare without inventing a safe-width threshold. |
| Any step between the two sides or movement noticed during ordinary use | Raises a different question from a surface mark with no observed height difference. |
| Dampness and its timing after rain, thaw or plumbing use | Keeps water investigation separate from choosing filler or a flooring underlay. |
Ask the flooring installer to identify any intended movement joints separately from cracks before selecting a repair. Keep uncertain or changing conditions visible for assessment; a finished-floor sample cannot answer what the slab is doing.
For an exposed garage slab that is shedding its surface, the scaling-before-coating guide covers a different preparation problem, including salt exposure, remaining substrate and old finishes.
Match the repair to the finish and the problem
Ask what each proposed product is intended to do: fill a void, prepare a surface, isolate certain movement, or address moisture. Those are separate functions. Do not fill every intentional joint simply to make the concrete look continuous. Keep the repair compatible with the chosen adhesive, underlay, and flooring instructions.
Separate a crack, a joint and a surface defect
Irregular crack
Trace and photograph its course; record change, dampness and any height difference.
Intentional joint
Identify it from the slab layout or assessment; establish how it continues through the selected finish.
Surface chip or rough patch
Confirm sound concrete below and select compatible preparation after the slab condition is understood.
Recognition prompts, not a diagnosis from appearance alone.
| Proposal | What it can address | What it does not establish |
|---|---|---|
| Patching or levelling compound | A compatible surface profile on a suitable substrate | That movement or water entry has stopped |
| Crack-isolation layer for tile | Movement types and limits specified by that system | Permission to bridge every joint or vertical displacement |
| Floating flooring underlay | A specified part of that flooring assembly | Structural repair or acceptance of a wet slab |
| Moisture-control treatment | The condition covered by its written specification | A repair for every active leak or hydrostatic condition |
Suppose the installer finds an irregular crack and a straight saw-cut line in the same room. The written plan should identify each separately, name the preparation product and state what happens where the new floor crosses the line. A quote saying fill cracks and install flooring leaves the most important decision unresolved. If a crack has displaced edges, do not grind away that evidence before the assessor has seen it.
Keep the flooring and preparation documents together. Ask the installer to confirm compatibility between primer, patch, moisture treatment, adhesive and floor covering, including any drying or curing stages. Product sequence matters: an otherwise suitable adhesive may not be approved over an unspecified coating. A change of flooring can also change the required preparation, so send revised product choices back to the installer rather than simply swapping the showroom sample.
Before covering, take a second set of photographs from the original positions. Record the assessment decision, the repairs actually completed and the test records the chosen flooring requires. If the condition differs from the assessed one, pause and resolve it. This is the point where a short written note is more useful than a surprisingly smooth-looking slab.
The basement flooring moisture guide gives a product-specific acceptance example. Also check the bottom stair after raising the floor; preparation thickness belongs in that calculation.
Before the next step
- Photograph cracks before grinding or filling.
- Flag displacement, active change, and moisture.
- Get a compatible written preparation specification.
Keep the crack visible until the assessment and compatible repair plan are settled. Then you can choose the finish with fewer unanswered questions. Compare carpet with more inspectable finishes once the slab is understood.